Adding Alerts to a Schedule
There are many places where you can assign an alert to a schedule: [1] from the Alert Management page (see below), [2] from the Schedule tab of the Alert Properties
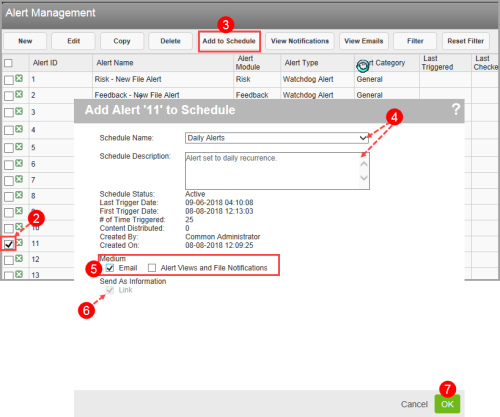
To add alerts to a schedule:
- Click the Logged in as menu and click Admin A warning that is sent out in the form of an email and/or an in-system alert notification under defined circumstances (e.g. an abnormally high number of complaints or incidents are reported, a high severity incident occurs, or when a file is ignored for a given period of time). Alerts are created by your administrator and are triggered at defined intervals (e.g. daily, weekly, monthly). section, click Alert Management (not shown). A list of existing alerts appears.
- Check the box next to the alert you would like to assign to a schedule.
- Click Add to Schedule.
- Choose a Schedule Name and enter a Schedule Description.
- Check at least one Medium box:
- Email – to add the alert message to the email notification sent by the schedule.
- Alert Views and File Notifications –
- The Link box under Send As Information is checked by default. This includes a link to the user’s Alert Notifications page in the email notification sent by the schedule. You may clear the check box to remove the link but it is recommended that you keep it checked.
- Click OK.