Organizing Alerts with Categories
Categories help
Prerequisite: You must have the 'Alert Categories' function enabled for your role.
To create or modify an alert category:
- Click the Logged in as menu and click Admin
- Under the AlertsA warning that is sent out in the form of an email and/or an in-system alert notification under defined circumstances (e.g. an abnormally high number of complaints or incidents are reported, a high severity incident occurs, or when a file is ignored for a given period of time). Alerts are created by your administrator and are triggered at defined intervals (e.g. daily, weekly, monthly). section, click Alert Categories (not shown). A list of existing alert categories appears.
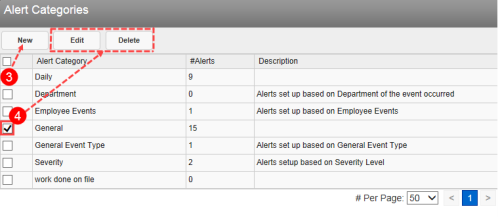
- To create a new alert category, click the New button (page 1).
- To work with an existing record, check the box next to an alert category to activate the following action buttons:
- Edit – used to edit the selected alert category. This button is active when only one record is selected. The same
- Delete – used to remove the alert category from the list. You may delete multiple alert categories at once. If alerts exist for the category, you must remove the association before it can be deleted.
- Edit – used to edit the selected alert category. This button is active when only one record is selected. The same
- Tip: The #Alerts column shows how many alerts have been added to the category.