Adding an Alert to a Schedule
The Schedules tab allows you to both add and remove the alert from a schedule, which is the timing mechanism that triggers the associated alerts and notifies users when matching records are found (Managing Schedules). You may also add alerts to schedules from the Alert Management page (Adding Alerts to a Schedule).
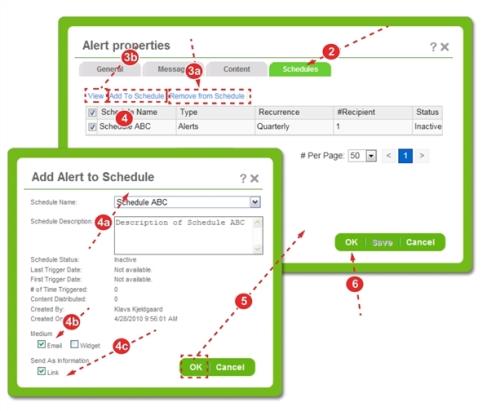
To add or remove an alert from an schedule:
- Open the Alert Properties
- Click the Schedules tab. Existing assigned schedules are shown in the list.
- Note: For new alerts, you must click the Save button to show the links described below.
- Select a schedule to activate these links:
- Remove from Schedule – to disassociate the alert and schedule.
- View – to review schedule, Medium and Send As Information settings.
- Click Add to Schedule:
- Choose a Schedule Name.
- Select a Medium to include the alert message in the Email generated by the schedule and/or as a record in the Alerts Widget.
- Check the Link box to include a link to the alert notification in the email sent to the user.
- Click OK to save your changes and return to the Alert Properties
- Click OK to save and close the alert.