Concept Information
Related Tasks
Adding a Report to Your Favorites List
Modifying Report and Snapshot Properties
Modifying Report Snapshot Properties
Reference Materials
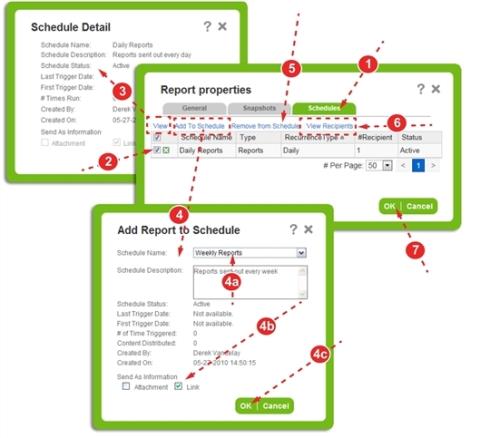
Adding a Report to a Schedule
The Schedules tab is used to view the schedules to which the report has been assigned. If your role assignment permits, you may also add or remove the report from schedules.
Prerequisites: You must have the 'View Report Properties' and 'Add Reports to Schedules' functions enabled for your role.
To add or remove a report from a schedule:
- Access the Report Properties
- Check the box next to one of the schedules.
- Click View to open the Schedule Detail
- Click Add to Schedule to associate the report with an existing schedule:
- Choose a schedule from the Schedule Name list. Its details populate the read-only fields below.
- Check the Attachment box to include a PDFA Portable Document Format is a file format that has captured all the elements of a printed document as an electronic image that you can view, navigate, print, or forward to someone else. version of the report in the email notification. The Link box is checked by default and includes a hyperlink to access the report in RL6.
- Click OK.
- Click Remove from Schedule to take the report off the schedule’s job list. You must click Yes to confirm your action.
- Click View Recipients to view the list of users included in the selected schedule.
- Note: See Adding, Modifying, and Copying Schedules for instructions on creating schedules.
- Click OK to save your changes or navigate to another tab: General (Modifying Report and Snapshot Properties) or Snapshots (Modifying Report Snapshot Properties).