Concept Information
Related Tasks
Using a Submitted File as a Template
Selecting and Viewing a Submitted File
Managing a Mobile-Submitted File
Redacting Sensitive Data with Tags in a Memo Field
Submitting with a Responsive Form
Reference Materials
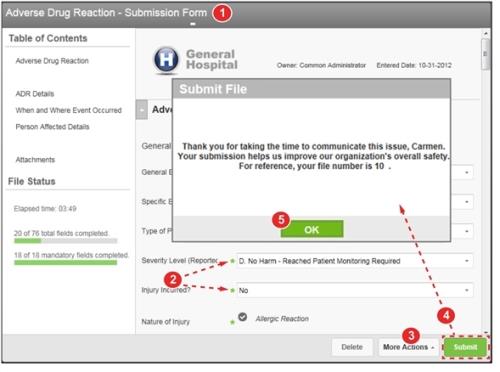
Submitting the File
Once all the required fields have been completed, you are ready to submit the file.
Note: The Person Affected details can be pre-populated if the new file is prompted from the Patient
Prerequisites: You must have the 'File Entry' function enabled for your role.
To submit a file:
- On the Icon Wall page, click an icon. A Submission form is displayed.
- Complete all the required fields. Required fields are marked by an asterisk (*) (page 1).
- (Optional) Click More Actions > Import File to link existing files with this file (page 1).
- (Optional) Click More Actions > Import File to link existing files with this file (see File Import Configurations in the AdministratorThe person in charge of managing and maintaining RL6. Guide).
- Click Submit. The Submit File
- Note: If required fields have not been completed, pop-up messages appear next to the required fields. A Form Letter
-
In the Submit File
The file is submitted with a status: New.
- Note: The message displayed in the Submit File
Note: If your system administrator has configured email parameters for submitted files, you may receive email notifications after the file is submitted, when the file is updated or when the file is closed.