Concept Information
Related Tasks
Creating a Report with Report Designer
Editing a Report with Report Designer
Making Common Changes with the Report Designer
Adding Borders and Shapes to a Report
Changing Font Size, Color and Type
Changing the Page Orientation and Modifying the Grid
Adding Minor Grid Lines to the Chart Wall
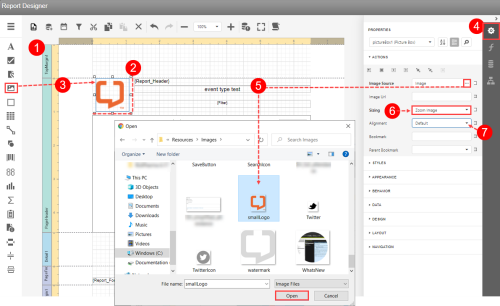
Adding a Logo to the Report
Many
To add a logo to the report:
- Open a report in the designer (see Editing a Report with Report Designer).
- Make space in the PageHeader band for the logo. One way to do this is to hold the Shift key down while clicking on all the elements in the band; then press the down arrow to nudge the elements down until enough space if left for the logo.
- In the Tool Box, click and drag the PictureBox element, releasing it in an open space in the band.
- Open the Properties panel at the right and expand the Actions section.
- Click on the Image Source field ellipsis (button) to select an image file for your logo from the directory and then click Open. Note: The PictureBox elements supports the following files: BMP, JPGAn image file format generally used for photographic images., JPEG, GIF, TIF, TIFF, PNG, ICO, DIB, RLE, JPE, JFIF, EMF, WMF, SVG.
- Select
Zoom Imagefrom the Sizing field to automatically resize the logo to fit in the PictureBox element. - (Optional) Select an Alignment option to change the alignment of the image.