The Filter section allows you to define a very specific set of criteria that must be met in order for the data to be included in the report. The filters available are based on the selected Context![]() The type of records that will be examined for reporting purposes, such as surveillance files, surgical procedures, central line insertions, etc. The values contained in other reporting drop-down lists change based upon the selected Context. (Defining Report Data). When
The type of records that will be examined for reporting purposes, such as surveillance files, surgical procedures, central line insertions, etc. The values contained in other reporting drop-down lists change based upon the selected Context. (Defining Report Data). When Surveillance File is selected, for example, only the fields used to create surveillance files are available as filters. If you include records where the field is empty, as shown below, you must also check the Report on those data where the value field(s) are empty box in the Show section (Defining Report Data).
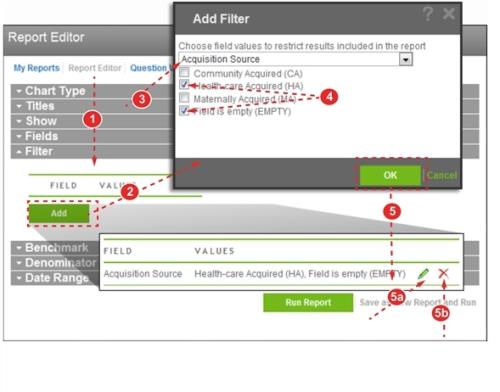
To work with report filters:
- Access the Report Editor (not shown, see Creating and Modifying Reports) and expand the Filter section.
- Click the Add button. The Add Filter
- Select a field from the list. The list of values for the field appears below.
- Select the values. Multiple selections act as “or” statements (e.g., the Acquisition Source field is
HAor is NullWhen a field does not contain a value (i.e., it has not been completed yet).). - Click OK. The filter appears:
- Edit – click the pencil icon to change the filter. The Edit Filter
- Delete – to remove the filter.
- Edit – click the pencil icon to change the filter. The Edit Filter
- Add more filters, if desired. Multiple filters act as “and” statements (i.e., the data must match all filters shown).
- For more details on the Report Editor, see: