Concept Information
Related Tasks
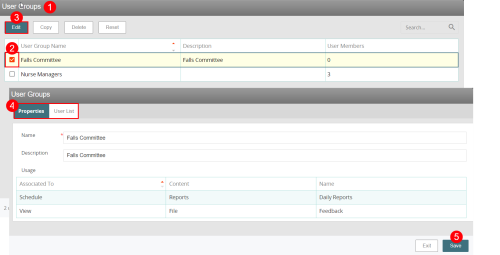
Editing a User Group
Tip: Before you edit the user group, find out where the User Group is used (page 1) to fully understand the impact of your changes.
To edit a user group:
- Open the User Groups page from the Admin
- Locate and select the user group that you want to edit.
- Note: Use the search field to enter a full or partial search within the group name or description.
- Click Edit. The user group properties are displayed.
- Make any necessary changes:
- Click Save to save the changes.
- The changes you make are saved and updated across the RL6 application. New users will now have access to the group's views and scheduled notifications, while users that have been removed will no longer have access to the views and scheduled notifications of the group.
- Note: If you do not want to save the changes you have made, click Exit instead of Save. A confirmation message is displayed to let you know that changes have not been saved. Click Discard. The changes are not saved.