The contact tracing grid allows you to find out who may have come in contact with a particular patient. From this page you can modify the patients shown in the grid, the sort order, or the chart format and zoom setting. You may also create follow-up files for one or more patients who have come in contact with the individual in question.
To work with contact tracing results:
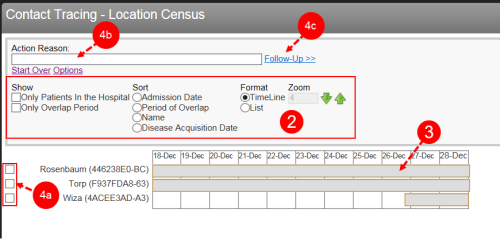
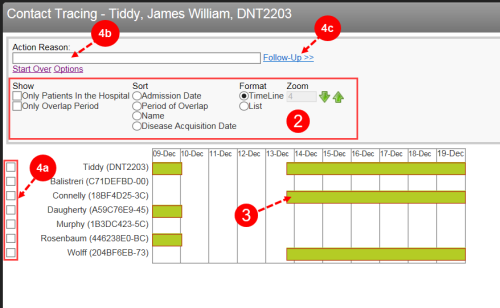
- Generate a contact tracing grid (not shown, see Contact Tracing). Horizontal bands display the time the patient has spent in the hospital:
- Grey – used in location-based contact tracing.
- Green – used in patient-based contact tracing.
- If necessary, modify the grid options:
- Show – choose to show only the patients currently admitted to the hospital or only those where an overlap exists (i.e., the bars that are highlighted in green).
- Sort – change the order of the patients in the grid. The base patient remains on top, with all the other arranged by your selection.
- Format – choose to display the data as time line (shown here) or as a list.
- Zoom – click the up or down arrows to zoom in or out of the grid.
- Hover over a bar to view patient details.
- To create a surveillance file for the users who have come in contact with the base patient:
- Check the boxes next to the patients for whom you would like to create a surveillance file.
- Enter the Action Reason.
- Click Follow-Up1. (For Infection) Another term for a surveillance file, which is created when the user selects Yes from the Choose a follow-up action control. 2. (For RL6) A file related action taken after the file has been submitted. Examples of follow-ups include
investigative notes, meetings with different parties, consultation with patient family.>>.
Patient-based Contact Tracing:
Location-based Contact Tracing: