Generating a Workbook from a Form
In order to have a better view and understanding of how a form is configured, administrators can export a form into a workbook which can be saved and printed.
Note: The workbook is exported into a Microsoft® Word file. In order to use this feature, you must have Microsoft® Word 2007 or later. If you do not have a supported version of Word, the system will still generate and allow you to save the workbook but you will not be able to open the file.
To generate a workbook from a form:
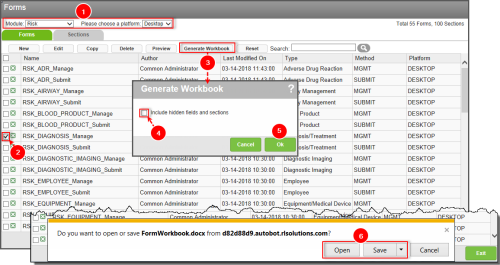
- Open the FormsA number of fields grouped together by sections to allow users to enter and store data related to a patient or employee event. You can define multiple forms for a module. Forms fall into two categories: submission forms (i.e. for front line entry users) and management forms (i.e. for file manager users). Management forms contain the same data as submission forms with added sections for follow-up investigations and resolutions and outcomes. page and choose the module (e.g., Risk) and platform (e.g., Desktop).
- Locate and select the form(s) from the list.
- Click Generate Workbook. The Generate Workbook
- To include hidden fields and sections (i.e., where visibility is set to false) from the form, check the Include hidden fields and sections box. If you do not want to include hidden fields and sections, leave the check box clear.
- Click Ok. Your browser displays a message prompting you to open or save the file.
- Open or save the workbook.
- Note: By default, generated workbooks are named "FormWorkbook.docx". It is recommended that you rename this file using form name(s) and the generation date.
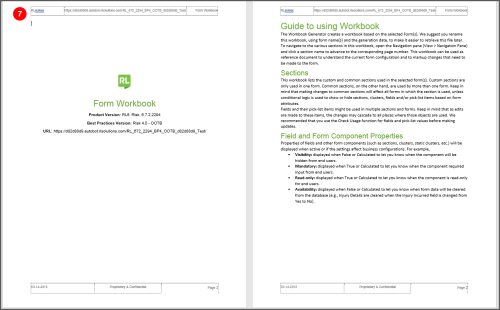
- (Optional) Open the file to review the workbook, make edits or annotations, or use the print functionality to print the workbook.